1. At the very beginning of the assignment, we started to import the given STL file into 123D Make and transform the Ferrari 250 GTO into a waffle structure.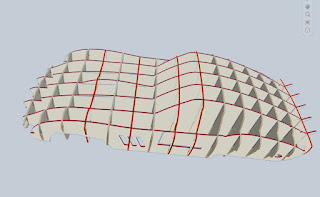

2. Then, we import the file from 123D Make into illustrator and had some fine adjustments to the laser templates.

3. We can now send these Illustrator files into laser cut! We had decided to use 3MM MDF as our laser cutting materials.

4. And now, we had the pieces cut and we are ready to assemble the Ferrari! There are lots of pieces! There are 22 pieces of X and 18 pieces of Y.


5. The waffle version of Ferrari 250 GTO is completed.

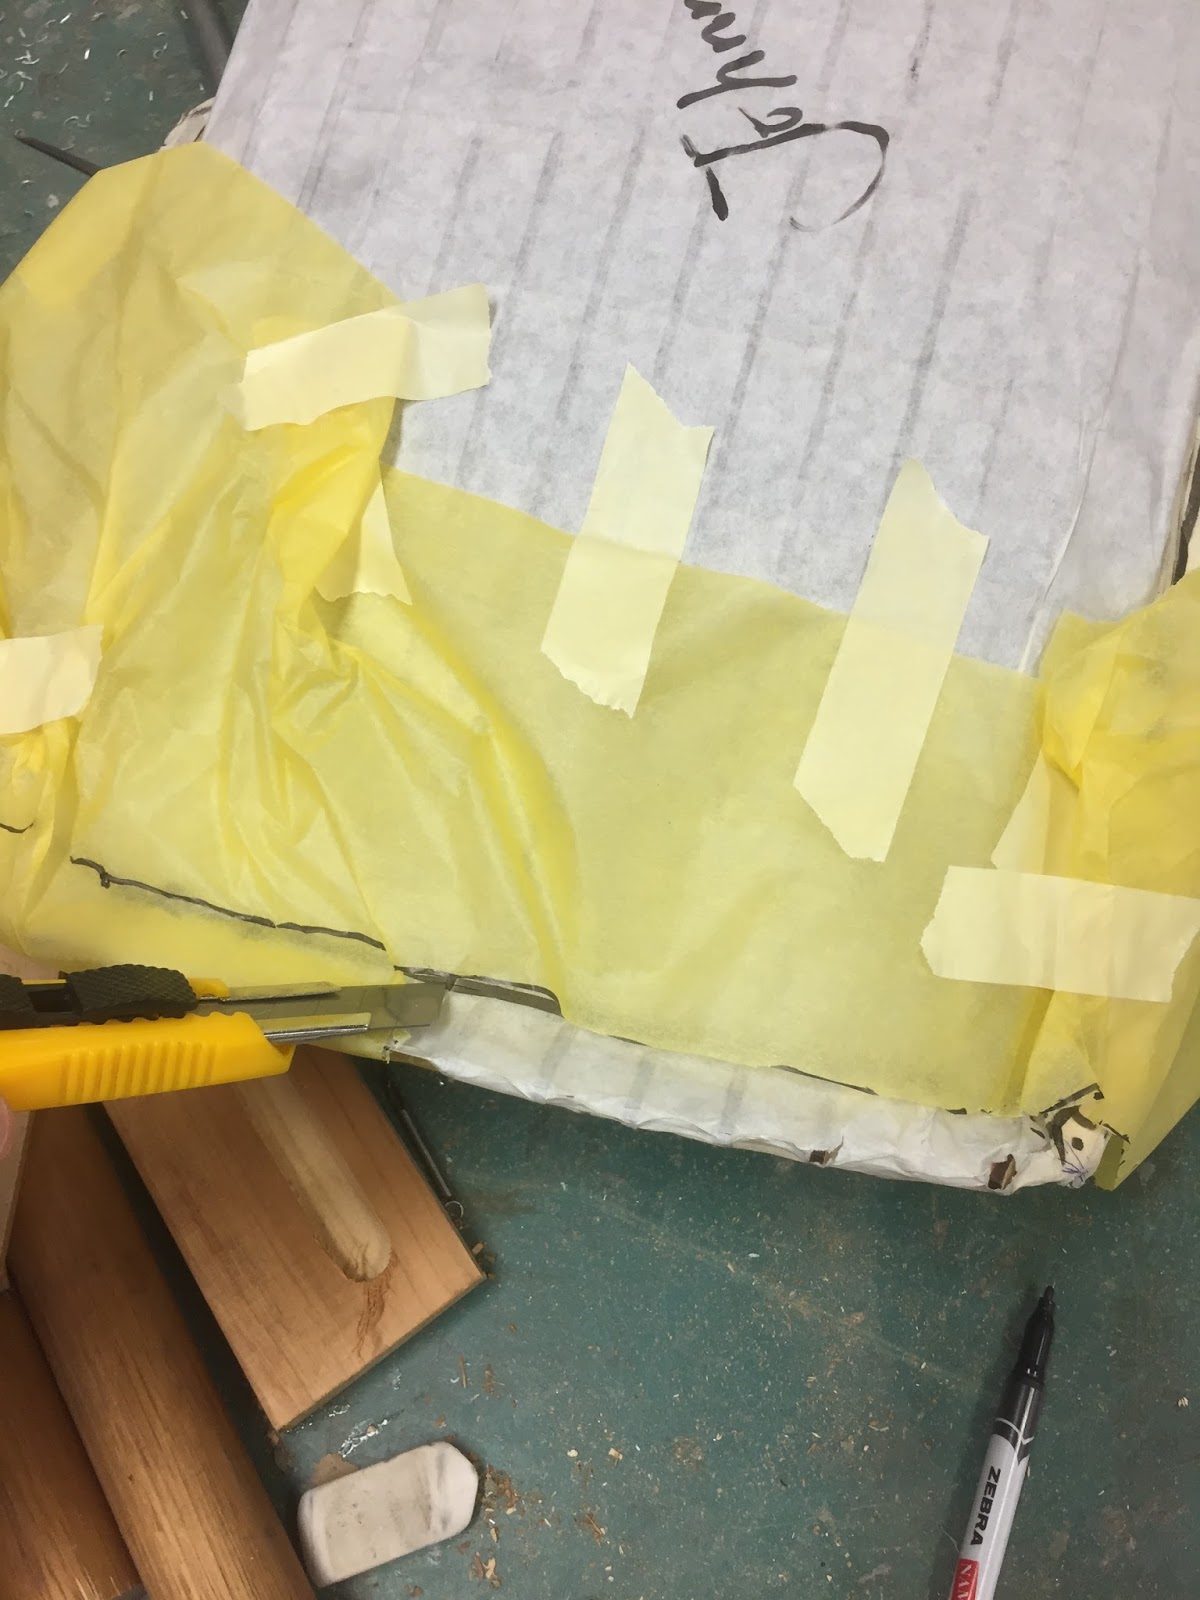
6. After completing the assembly, we use tape to cover the whole car so we can have a better view of the actual shape of the car. Therefore, this process will help our metal shaping process. I am being allocated to work on the rear of the car.


8. And then, I followed the line I drew and cut the piece of paper out.

9. Put the cut piece of tracing paper on an aluminium sheet, and roughly drew out the shape symmetrically.

10. Use a snip to cut out the excessive part of the aluminium sheet.


13. Use this large snip to trim off the unnecssary edges now.


5. The waffle version of Ferrari 250 GTO is completed.


7. At the start of the metal shaping process, I took a piece of tracing paper and taped at the back of the car. Then, I used a marker to draw out the shape I am being allocated to work on.


11. Following the guideline, I used the english wheel to create a reverse curve. The part I am doing the reverse curve with, it is related to the top section of the back side of the Ferrari. Although using an english wheel to make the reverse curve can keep the surface, it is a bit time consuming and not very efficient.


12. Therefore, I work on the metal shaping by using the egg-shaped nylon hammer/ wooden hammer.
(Notice that I first using the point end of the hammer to shape the general line/ shape of the aluminium, and then use the round end/ flat end of the hammer to continue the shaping. At the same time, I am also fixing the tucks occur during the hammering)


(Tips during the metal process is to refer to a picture of the car and as well as the waffle version of the car, which helps you to create a more accurate shape of the car.)

14. Starting to refine the part where it is flat surface, I used a flat head nylon hammer and trying to flat out the part I wanted it to be flatten. However, it is not quite effective as using the english wheel.


15. Testing whether the metal fits or not.
(I noticed that the metal isn't fit perfectly to the back of the car, there are some parts needed to be curve/ bend a little bit more.)

16. I went to this huge bending machine and bend this metal into the desired shape.

17. Since there are some restrictions of this machine, it cause some curve part of the aluminium are being flatten slightly. I went back to the bench and refine the shape.


18. A final fit test.

19. Finally, I use 80 grid sand paper, follow by 1200 grid sand paper to make the surface clean and smooth. Next, using the turpentine and Brasso to polish the skin, giving the skin a mirror like finish.
(After applying the Brasso with a soft cloth, it is necessarily to use a towel to rube off the Brasso, this process will require repeat for few times, in order to get a shiny surface.)


19. This is how all the parts combine together looks like. Done!


(Comment: I thought the part I am being allocated to work on is going to be an easy task, but as I start working on it, I release it is not easy. Since the shape of this part has quite a bit complex line involved, and to shape out the precise shape of the part could be limited by the skills i have on metal shaping.)
沒有留言:
張貼留言